Rawesome Vets · Internal Staff Protocol Vet Reception
Ordering Vetnostics Pathology
Scope: This SOP covers ordering a Vetnostics pathology test via OpenVPMS and printing the request form. The Vetnostics integration allows reports to be automatically attached directly to the patient's file in OpenVPMS when they arrive — no manual upload needed.
0. Common Profiles — Quick Reference
| Profile | Search term | Notes |
|---|---|---|
| Body Function Profile | %body | Interpreted haematology + biochemistry — most common external send-away |
| Non-interpreted Profile | %non | Includes TT4 +/− Amylase and Lipase |
All pathology items in OpenVPMS start with Path — you can always search %path to browse the full list.
1. Add the Test to the Invoice
- Open the patient visit and click the 2 Invoice tab.
- In the Product field, type
%path(or a more specific term, e.g.%body) and select the required test from the list. - In the New Investigation popup, click OK, then click Apply.
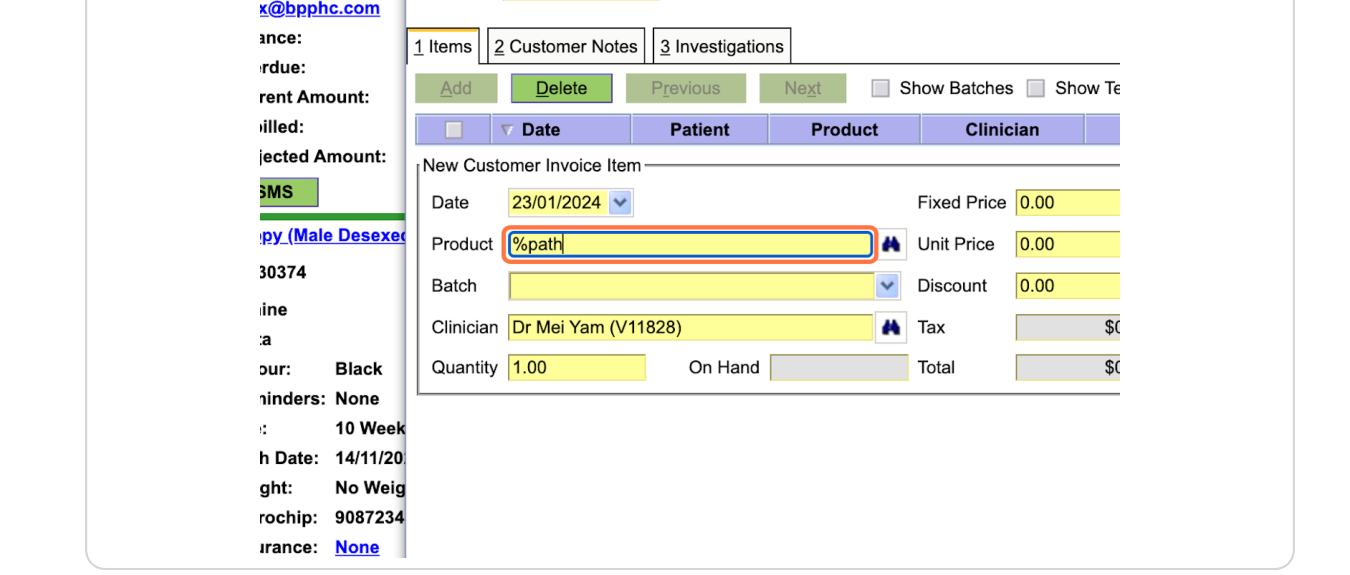
Product field with %path entered — select the test from the list that appears.
2. Print the Request Form
- Click the 3 Investigations tab — the investigation will be listed there.
- Click on it and the Print Form button will appear. Click it, then click OK.
- Attach the printed form to the sample for the Vetnostics driver.
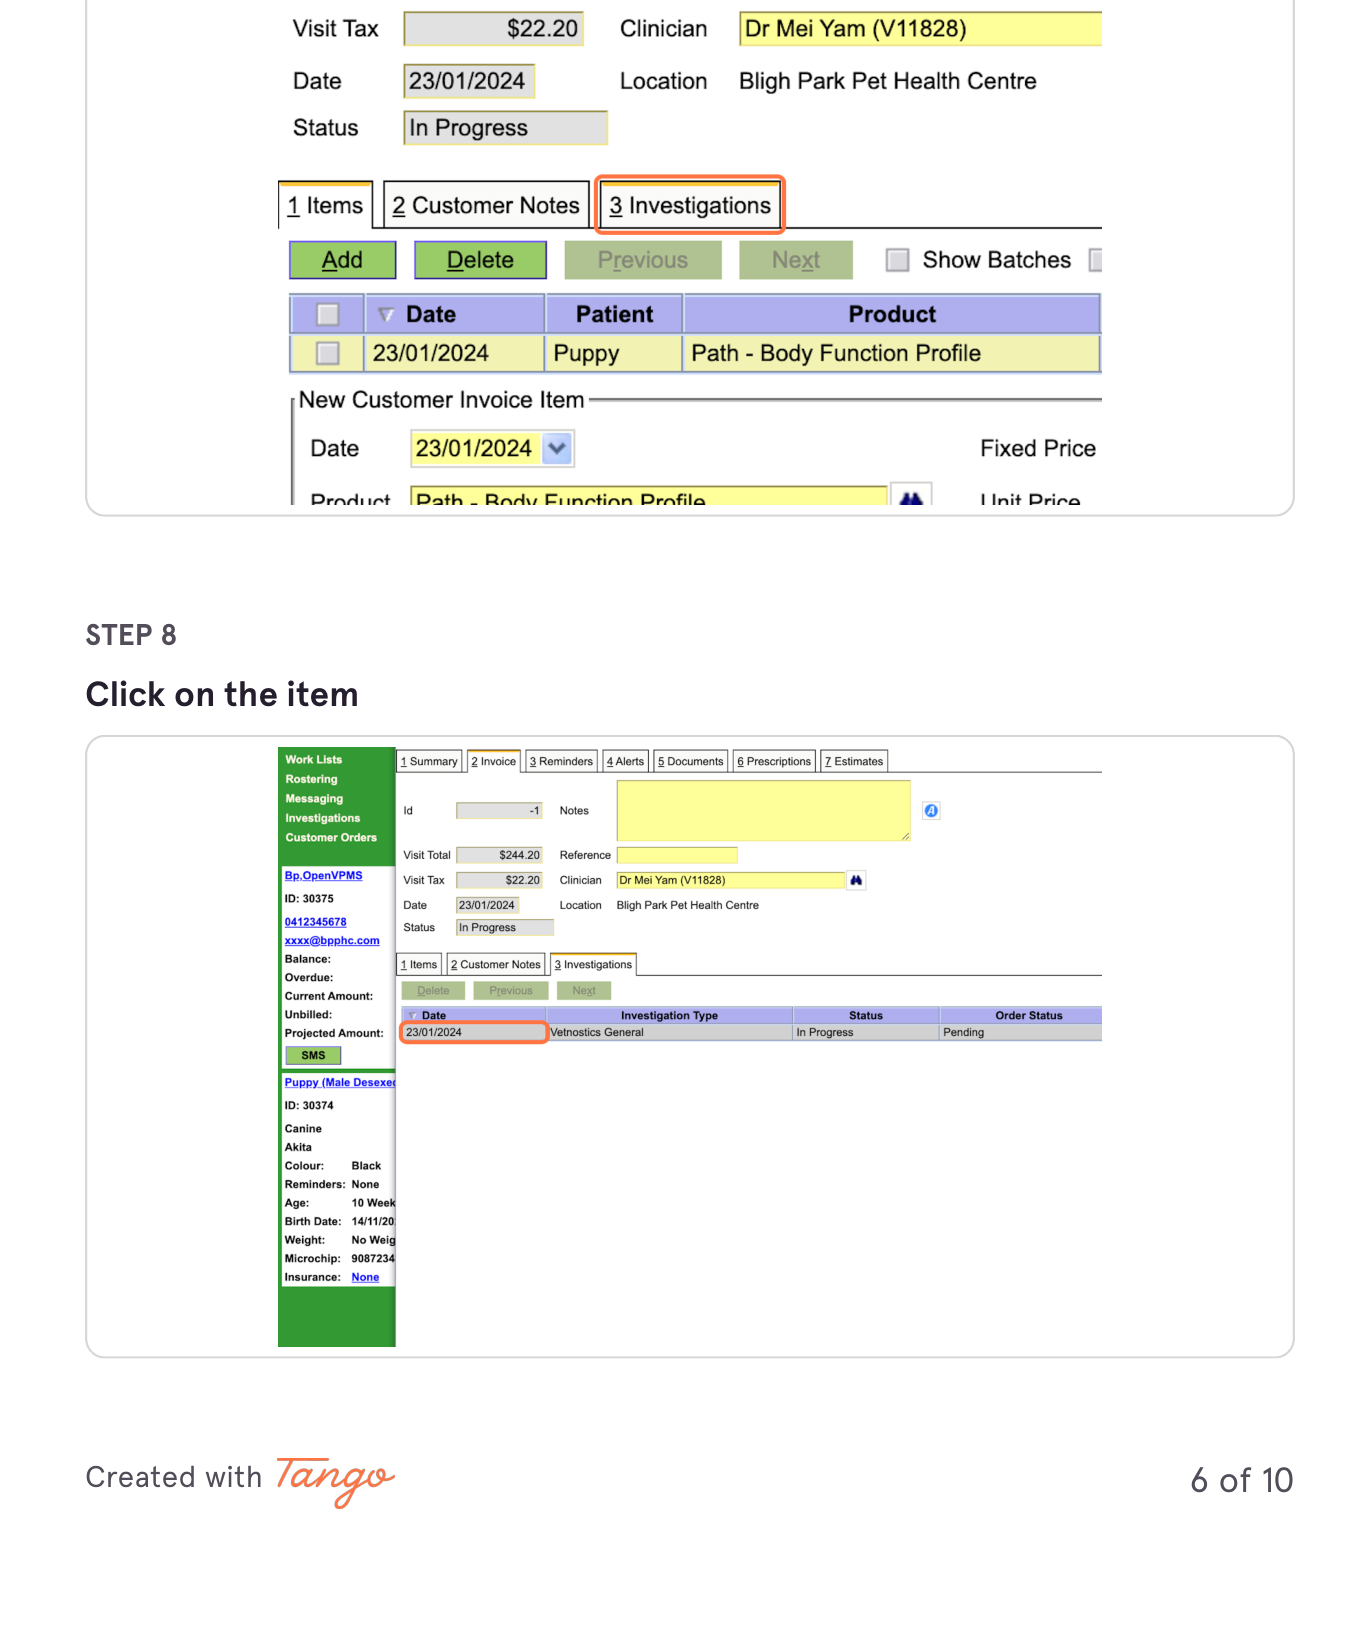
Click the 3 Investigations tab, then click the row to open the investigation details.
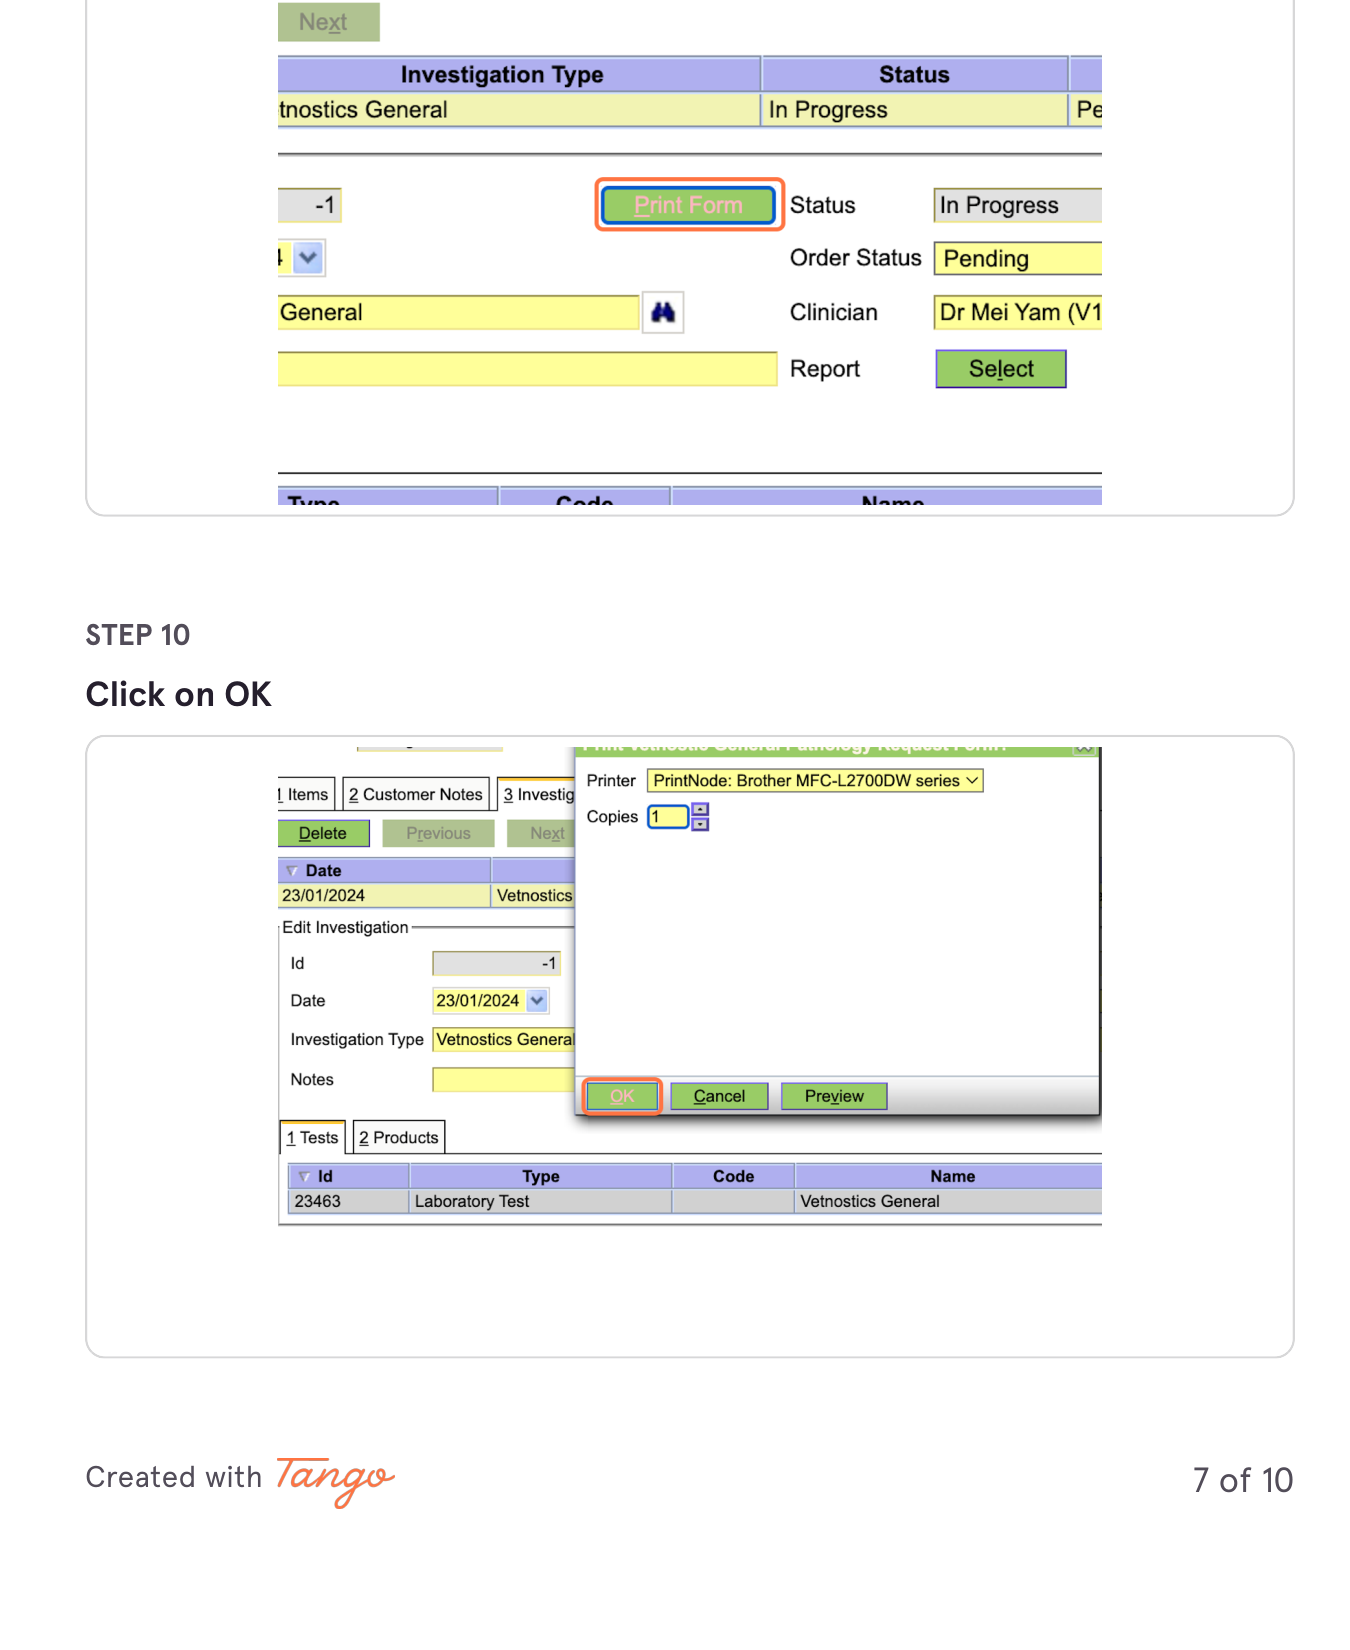
Click Print Form, confirm the printer, then click OK.
3. Finalise the Invoice
- Return to 1 Items to add anything else, then click Completed to finalise.
Things to Note
- Vetnostics reports auto-attach to the patient file. When a result arrives, Vetnostics emails it to us and OpenVPMS automatically pulls it into the patient's record. If the email is opened or marked as read before OpenVPMS has a chance to process it, the auto-attach will not work. Do not open Vetnostics result emails in your email client. If you do open one accidentally, mark it as unread immediately.
Sign Off
Confirm you have read and understood this SOP.